As my polish hoard, uh, collection, has grown I’ve been wanting to add a special feature so I can dish about polish outside of just what arrives in my subscription boxes. I’m kicking off my new Polished! feature with a topic that pervades every forum and group with serious polish collectors. Storage.
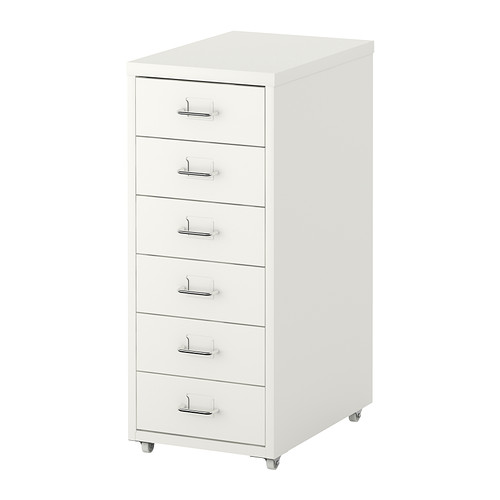
One of the most common storage solutions for expanding polish collections is the Ikea Helmer. Priced at a modest $39.99 it can house hundreds of bottles of your favorite hues in an itty bitty living space. With my collection currently clocking in at 365 bottles, this little guy would give me a spot for all my bottles, with room to add on to my collection.
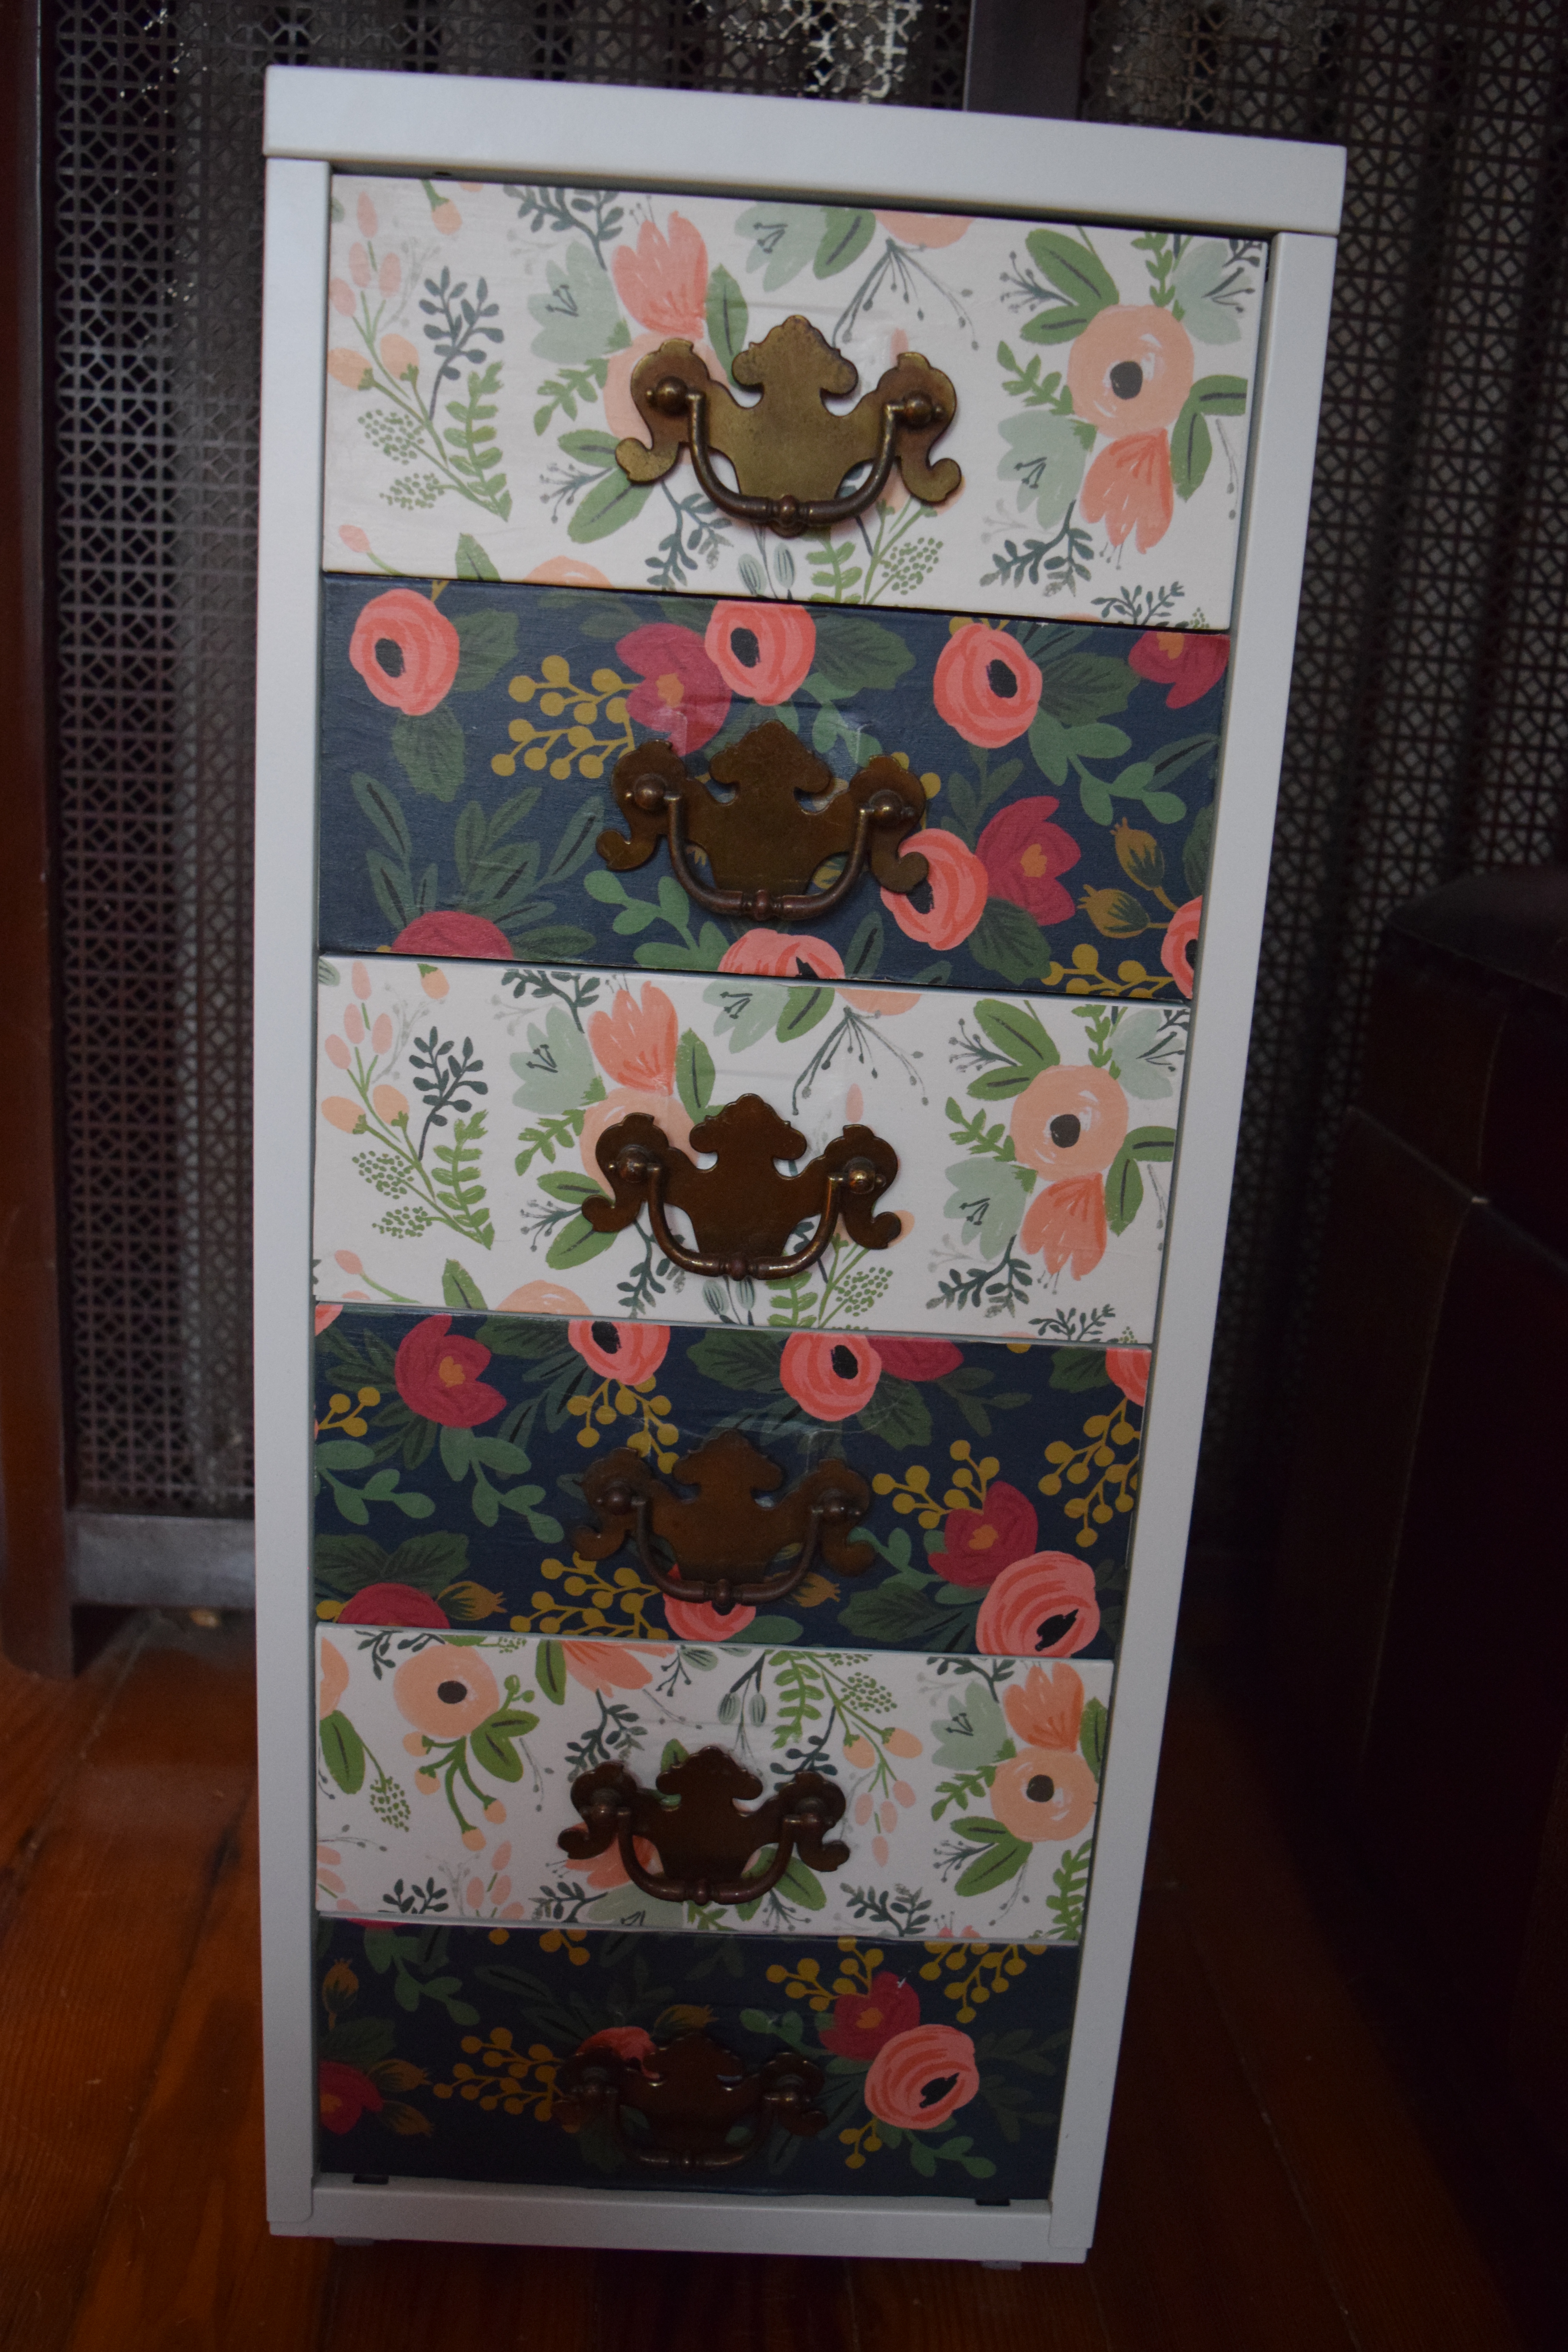
Unfortunately, the Helmer looks like an office filing cabinet rather than a piece of cute furniture, so I decided to give it a transformation by decoupaging the drawers and replacing the handles. I’m creative and crafty but not the best with precision so I was crossing my fingers that the end result would be decent.
THE TOOLS

- Hard Coat Mod Podge: After extensive research on the elventybillion types of ModPodge, I opted for the HardCoat. It’s perfect since it’s designed to be used for furniture and doesn’t require a sealant.
- Exacto Knife & Scissors: I recommend an exacto knife for precision.
- Brush: For applying Mod Podge
- Tongue Depressor or Popsicle stick: For flattening out the paper
- Paper: I went a bit spendy with my paper choice because I love the Rifle Paper Co. I opted to use their gift wrap in two different prints and alternate them on the drawer fronts. If you want to cover all the drawers with the same print, just be ready to spend a lot of time lining up the patterns correctly.
- Rubberized Shelf Liner: You want to line the drawers with rubberized shelf liner otherwise the bottles are going to move around when you open and close the drawers.
THE CHALLENGES
The cabinet has slots for putting in labels. I had hoped they were an extra piece I could pry off, but unfortunately they are molded into the metal so I had to work around them. I also knew I wanted to switch out the handles that came with the Helmer, but I couldn’t get an adequate fix on the size until I had the cabinet in hand. Unfortunately, the handles are smaller than average (approx. 2 1/2 inches), and I needed either 6 matching handles, 2 sets of 3 matching handles, or 6 coordinating handles. Adding to the challenge, I really wanted something in a vintage brass since I thought that would match well with the style of the Rifle paper.

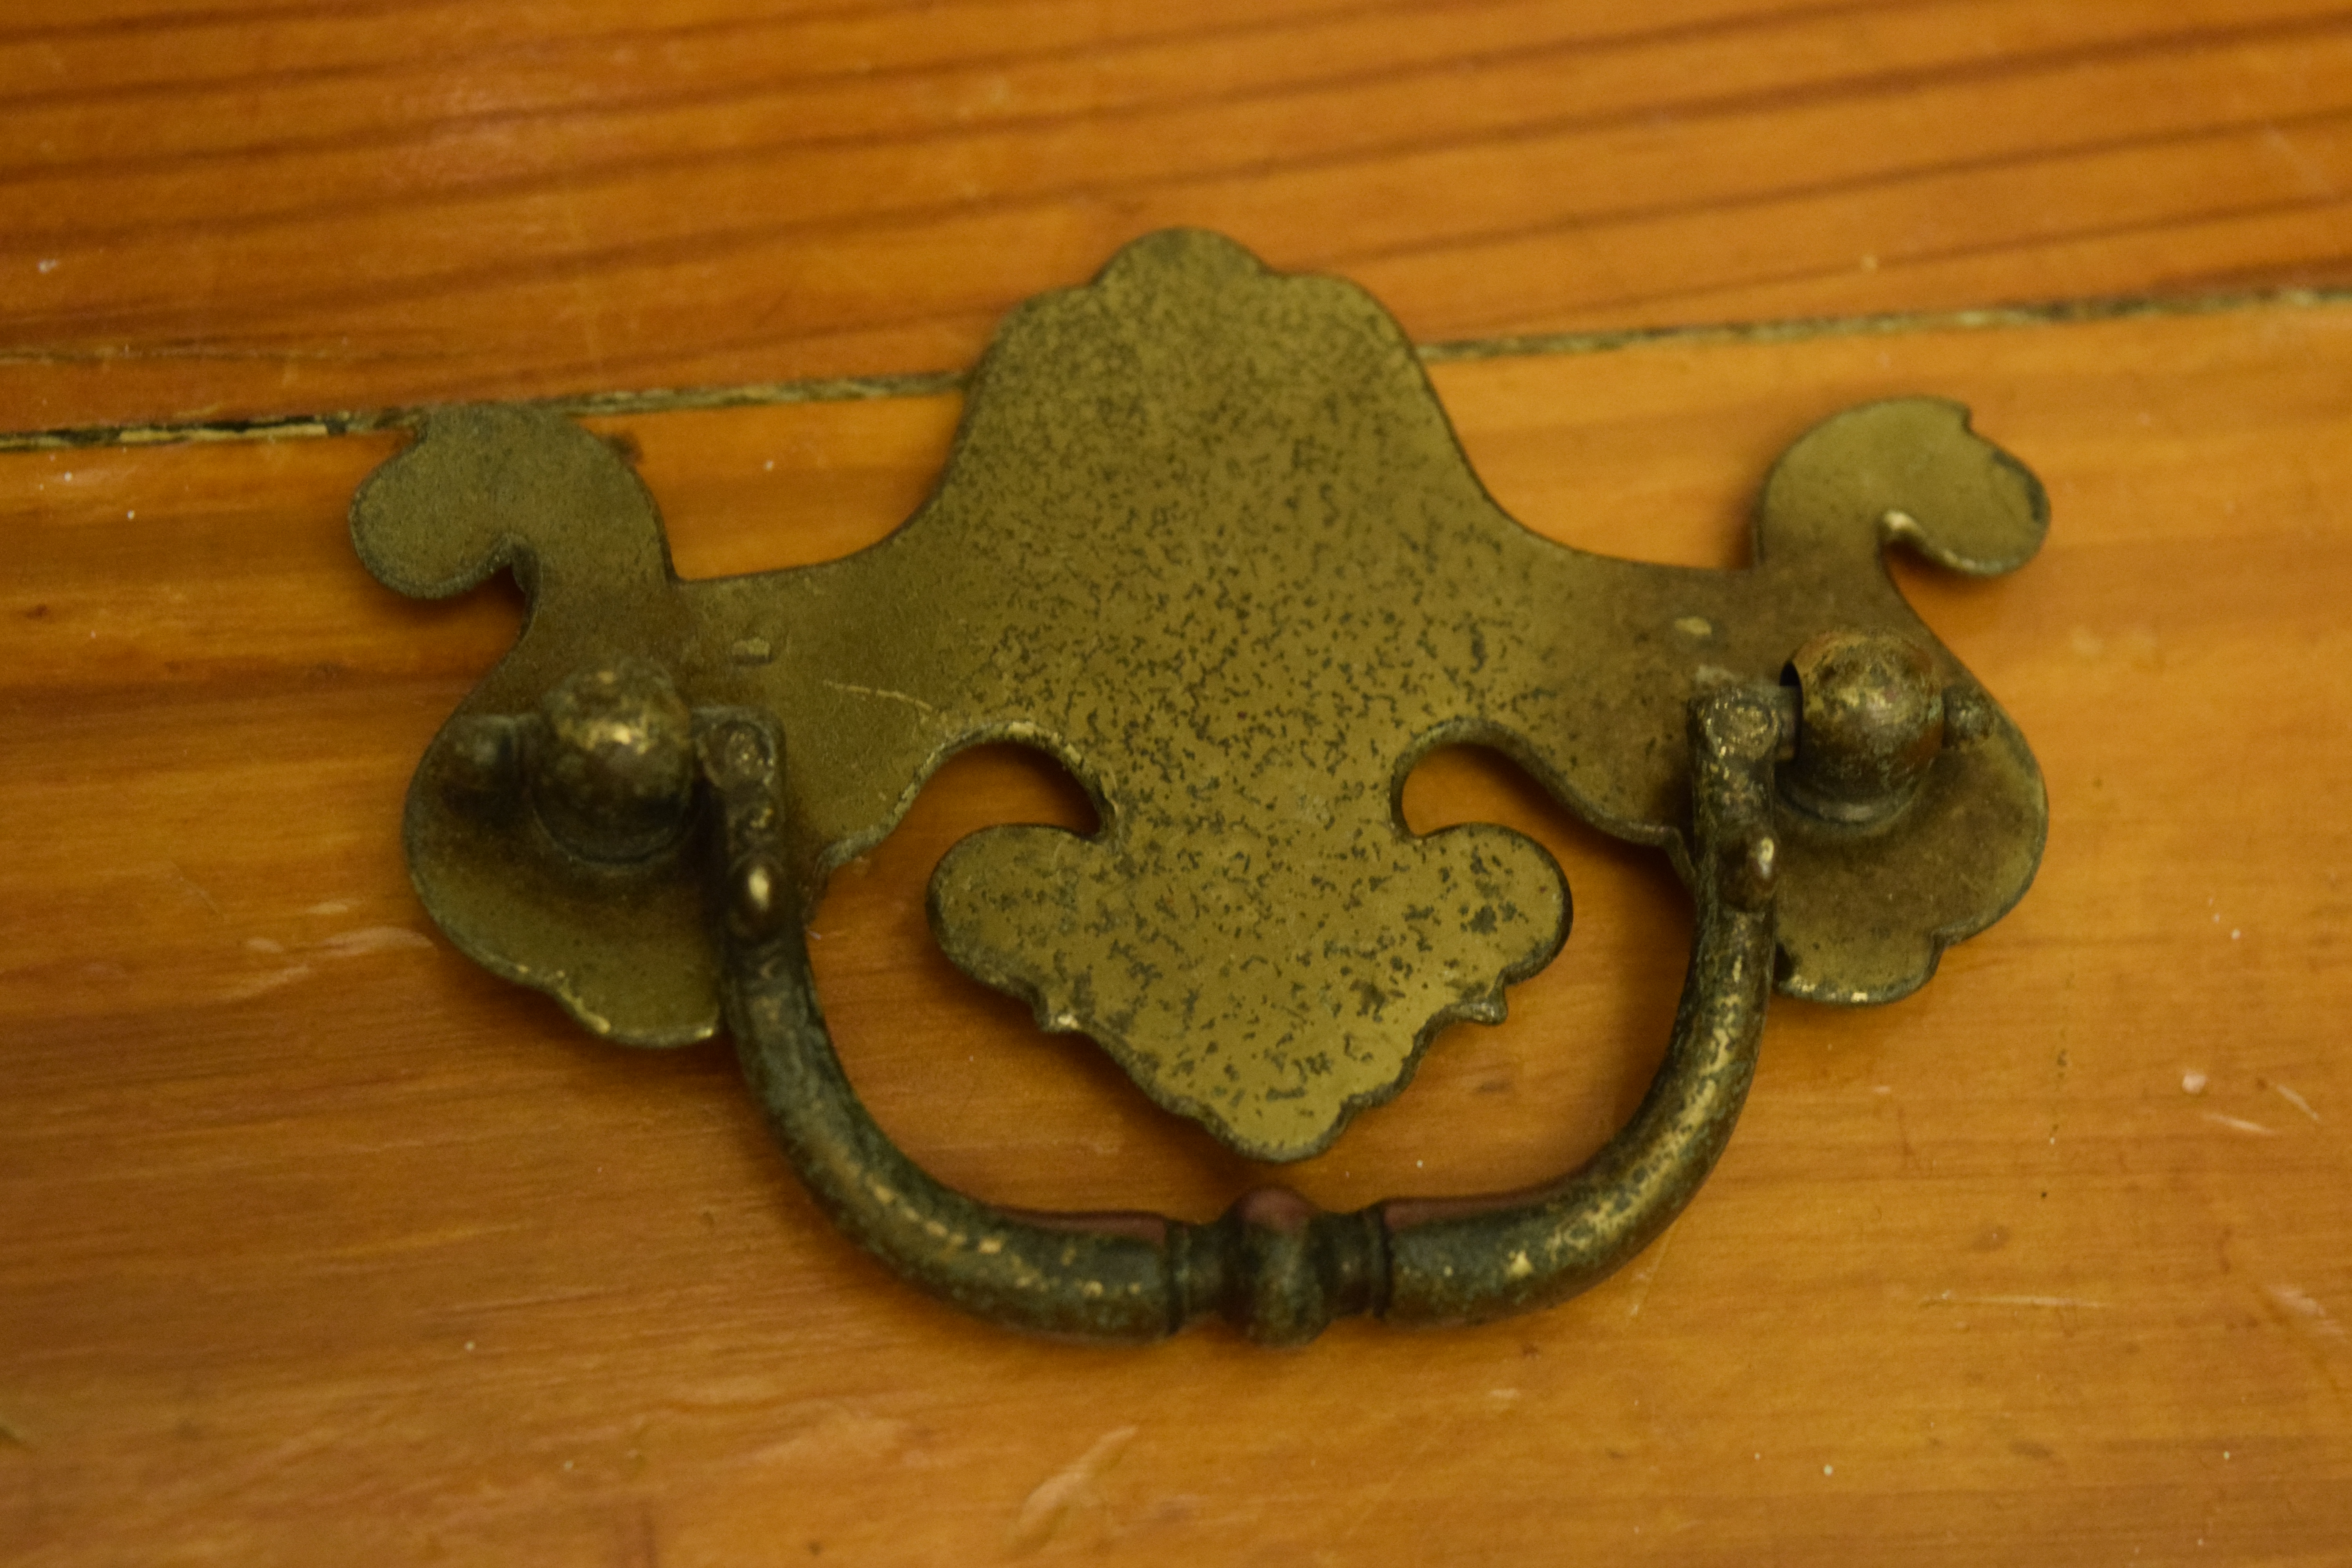
I came across these on Ebay and grabbed them for $14.88 including shipping. I was hoping the backplate would cover up the label slots, but unfortunately they were a bit small for the task.
CONSTRUCTION
With some cursing and much annoyance, I constructed the cabinet with the exception of the drawers. It’s important to note that the cabinet has some weird tabs that you just “push” down rather than using actual screws. It tells you to use a screwdriver to push down the tabs. If I need a screwdriver, why not just use a damn screw? I’d feel a lot better if the thing was held together with actual metal screws instead of just a tiny piece of bent metal and some faith, but I digress.
Using the exacto knife, I cut out paper the same size as the drawer fronts. I applied a layer of Modpodge to the drawer fronts, carefully aligned the paper on top, then another layer of Modpodge. I used the tongue depressor to smooth out any bumps. I let that layer dry and then added an additional layer, focusing on the edges. Since you’ve now covered up the holes for the handles, you’ll just need to carefully poke the holes for the screws.
While the drawer fronts dried, I cut the rubberized shelf paper to size.

Then, I completed the drawers. I was still waiting on my handles, so I went ahead and finished the cabinet using the original handles in the box and added my plethora of polish.


Here’s a looksee of the version using the included Ikea handles:
Once my new/old handles arrived I replaced them. I used the same handle screws that came with the Helmer, but I plan to add some washers or pick up some slightly different screws so the handles are a bit tighter. They are serviceable but it would be better if they were snugger.

COSTS
I already had the scissors, exacto knife set, brush and tongue depressor so I didn’t need to purchase those items. The cost to me for this IKEA hack is as follows (including tax & shipping):
| White Ikea Helmer | $42.79 |
| Rifle Paper Co Wrapping Paper | $21.95 |
| HardCoat ModPodge | $6.22 |
| Handles | $14.88 |
| Rubberized Shelf Lining Paper | $4.74 |
| TOTAL | $90.58 |
I opted for expensive paper in two different prints so if you use cheaper paper, or just one print, your cost will be lower. In addition, you could always skip adding your own handles as another way to get the cost down.
OVERALL
The Helmer is perfectly sized to hold polish, but not taller items like Nail Polish remover. I have a vintage train case that I use to hold my swatch sticks, tools and taller items. So just be aware you’ll probably need to make room elsewhere for other polish related paraphernalia.

The cabinet isn’t the sturdiest thing in the world, and I was super concerned when putting it together, but now that it’s all in one piece it’s much stronger than I thought it would be and better than I expected at this price point. I’d like handles that can do a better job of covering the bump where the label would be inserted. I’m going to keep my eyes open and see if anything pops up on Ebay or Etsy.
I’d love to hear your opinions on my IKEA hack and whether you’d like to see more DIY or polish posts!


Leave a comment